Posted in : Microsoft Av Gus Johansson Översätt med Google ⟶
6 years ago
Hi and welcome to my walkthrough of setting up an on-premise data gateway.
What is an on-premise data gateway? Microsoft has provided a very good answer to this question in the link within the question. If you are looking for an easy explanation: Connect your on-premise data securely to your cloud services (Power BI, PowerApps, Power Automate, Azure Analysis Services, and Azure Logic Apps). In my scenario I am showing you how to install an on-premise data gateway to connect Power Bi to on-premise data.
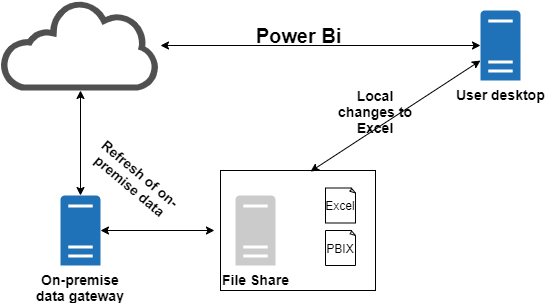
Below you can see a simplified topology of how you set this up.
- A machine with the on-premise data gateway software installed. This needs to be on-premises and be able to reach the storage area where the data is kept. If you are using other sources of data, the rule still applies: the data needs to be reachable by this machine. Minimum requirements and installation guide is found here.
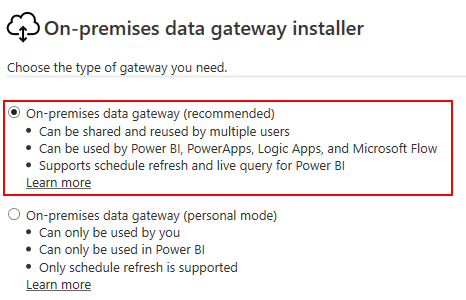
- Installation is easy, run the installer found here. You have ”one” decision to make (unless you want to complicate things and change installation directory) and that is whether or not you would like a personal mode or not. The ”non-personal” is the recommended.
- You then have to register the data gateway to your tenant. This is to be done with your admin account.
- Type in a name for the on-premises data gateway and choose a recovery key. Keep the key in a safe place!
- Now you have installed the on-premises data gateway.
- Installation is easy, run the installer found here. You have ”one” decision to make (unless you want to complicate things and change installation directory) and that is whether or not you would like a personal mode or not. The ”non-personal” is the recommended.
- This is where things get a little bit more complicated. As you can see on the topology you probably have most components now. User desktop, file share, on-premise data gateway and apps in Cloud waiting for data. Now we have to make sure that the on-premises data gateway can read the data you wish to publish in the cloud. It is done fairly easy if you know what to do:
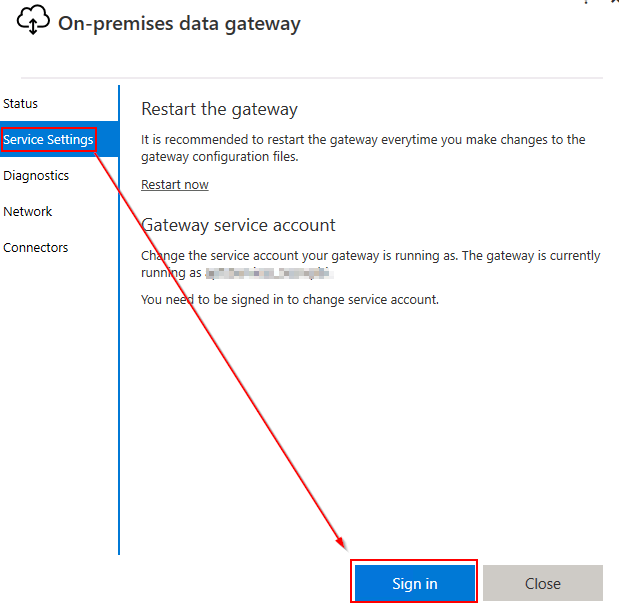
- Within the on-premises data gateway application you can through Service Settings > Sign In change the account which is locally used to run the application/service. This needs to be an account that has read rights on the data you wish to upload to cloud.
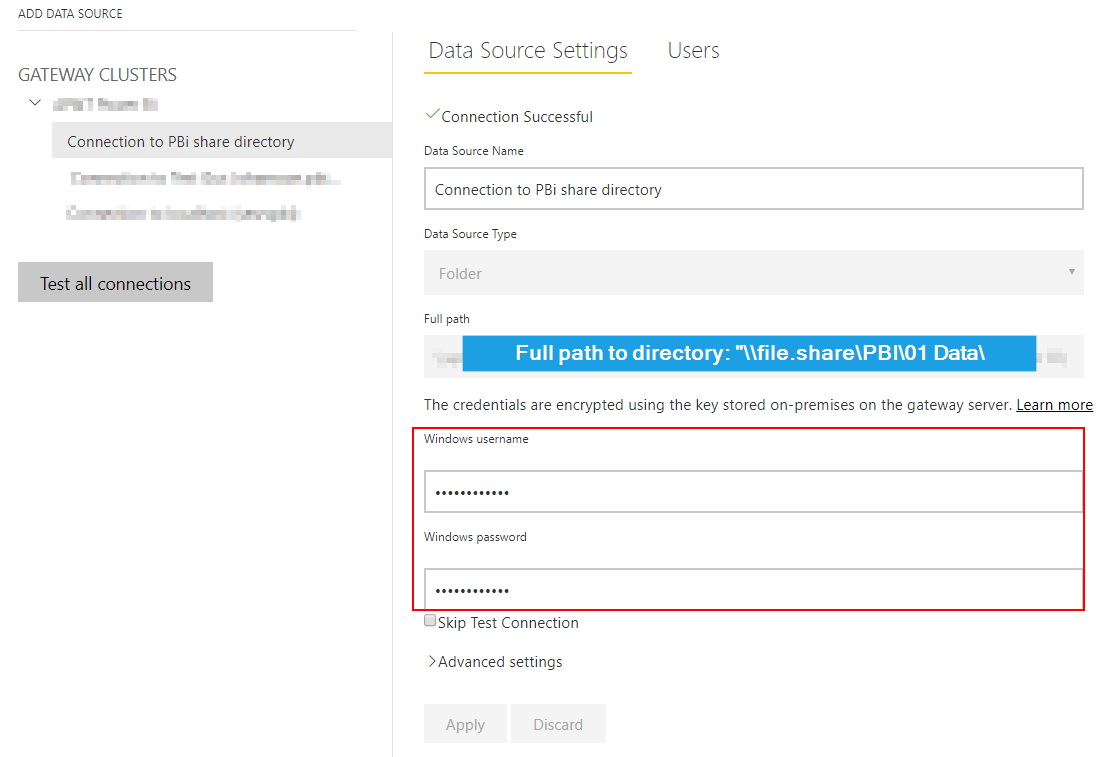
- Make sure you use an account that has read rights on the share (or if you store data locally on the on-premises data gateway). In this scenario I am using a file share: \\file.share\PBI\01 Data and a file of the name ”Testdata.xlsx”.
- You can use Effective Access to view rights on folders and files.
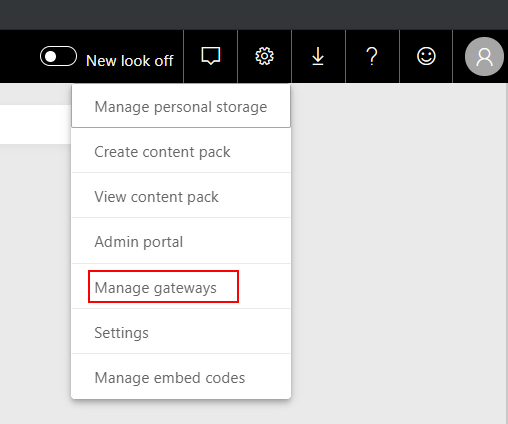
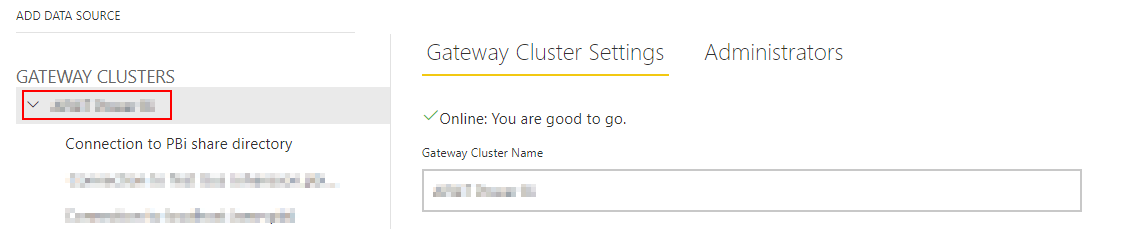
- Once we have set up the on-premises data gateway and made sure it has the correct rights to access the data which we wish to include within PBi we can move over to app.powerbi.com. Logon and then access the ”Manage gateways” settings through the cog wheel in the top right.
- You will now see the added on-premises data gateway if everything was made correctly. Here you add administrators and data sources.

- Add a data source:
- Enter full path to the directory where you store the Excel data.
- Enter Windows credentials that have rights to read this. I use the service account for the on-premises data gateway. This can differ depending on setups etc.
- Within the ”Users” tab you can administer what/which users can publish reports using this data source.
- If done correctly, you are now done. You have set up an on-premises data gateway that allows your users to publish dashboard and schedule refresh intervals. The data source can differ and for example an SQL server or other files can be used. Remember that the data sources you have specified are the ones that need to be used otherwise the automatic refresh (or manual) is not going to work.
- Within the on-premises data gateway application you can through Service Settings > Sign In change the account which is locally used to run the application/service. This needs to be an account that has read rights on the data you wish to upload to cloud.

If needed I can contribute with a guide on how to publish dashboard with scheduled refreshes on data. Please comment below if needed.
Thank you for reading and please feel free to provide comments on feedback and your solutions to the same scenario.
Best regards,
Gus Johansson
Personlig rådgivning
Vi erbjuder personlig rådgivning med författaren för 1400 SEK per timme. Anmäl ditt intresse i här så återkommer vi så snart vi kan.

Comments
Oliver Quino says
Thanks a lot for you simply and useful explanation
Add comment