Posted in : Applications, Azure, Intune, Microsoft, Powershell, System Center, Windows Av xenit Översätt med Google ⟶
5 years ago
Hi there & welcome,
In this post I will describe how to deploy an application using Microsoft Endpoint Manager, formerly known as Intune on a very basic level. Endpoint Manager is the cloud version of System Center Configuration Manager (SCCM) and is widely used by many organizations.
Introduction
What is the meaning of deploying an application?
Imaging that you are an IT administrator at a company with 1000 computers, 100 of these are located at the finance department.
One day the finance department decide to invest into a new application and need your help to install it on all of their computers.
Instead of installing it manually on every computer you can deploy it once via Endpoint Manager and have it delivered to the computers.
Requirements
Licenses
- Microsoft 365
- F1
- F3
- E3
- E5
Click here for more information
Operating System
- All client computers need to be installed with Windows 10 and Azure Active Directory-joined, more information can be found here.
Deployment
- Start by entering the Microsoft Endpoint Manager admin center-portal.
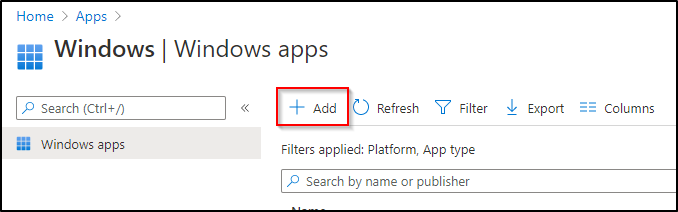
- In the left menu choose Apps and Windows, then press Add.
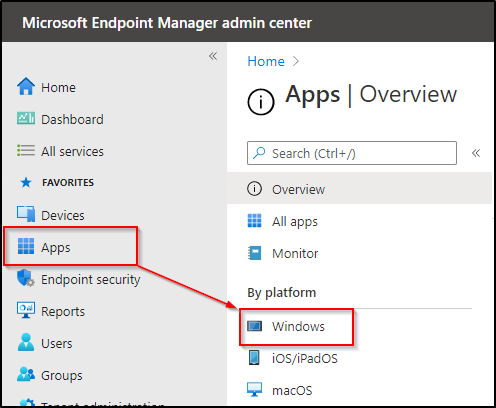
- Now you need to choose what type of application you want to deploy.
In my example I will go with the Windows app (Win32) option.

- Line-of-business app would be your choice if the installation file is an .msi
- Windows app (Win32) is used when the installation file is a .exe
- In this step we need to upload the actual installation file, but it need to be in a format called .intunewin.
Here we need some help from a tool to wrap the .exe-file into the .intunewin-format so that it can be uploaded to Endpoint Manager.- Start by downloading the Win32 Content Prep Tool and unpack it.
- Create two folders, named Input and Output, place your .exe-file in the Input folder.
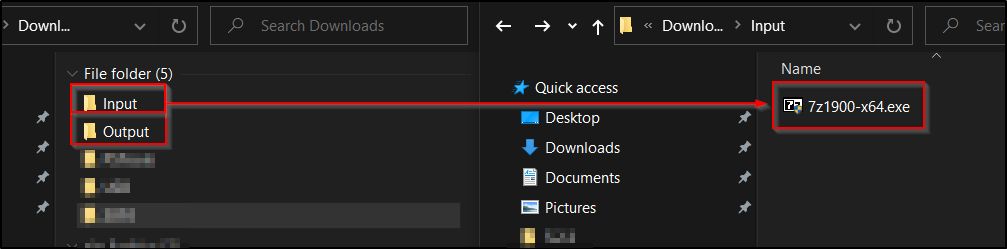
- Run the following file IntuneWinAppUtil.exe and follow the information.

- When the script is done you will now have a .intunewin-file in your Output-folder.
- Once you have uploded the .intunewin-file fill in basic information regarding the application.

- In the next step we have to specify the installation commands. This can vary from application to application, and it’s often easier to find installation arguments for msi. applications rather than .exe. Some of the arguments in this article is just for showing purposes, therefore you will have to do some research when looking for your own application arguments.At the install command I point at the .exe file, and after that I use the /S argument for silent installation.When pushing out applications to many users at the same time it’s often recommended to look for a silent argument so the installation runs in the background and the user can’t interfere with it. At ”Install behavior” I choose to install it as System since it has more permissions than the normal User. Remember that it’s best practice to not let normal users be local administrator on the computer!I prefer not to restart the computer if I really don’t have to, therefore I choose No specific action. In this case we will leave all Return codes as it is, and normally you don’t need to change these.

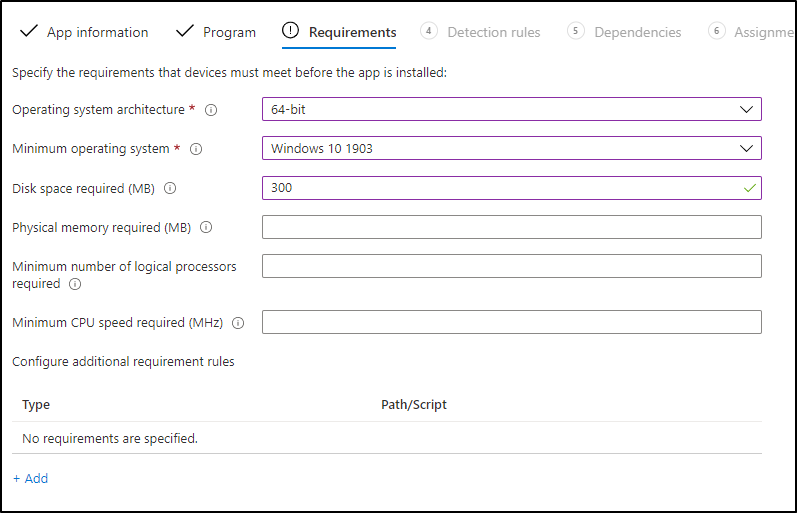
- Now you will specify what minimum criteria the clients must meet before they are allowed to install the application. I would recommend to specify the latest version of operating system that is available, that will put a pressure on the organization to keep their clients up to date.
- In this step we need to setup the rules that will make Endpoint Manager understand that the application is installed.
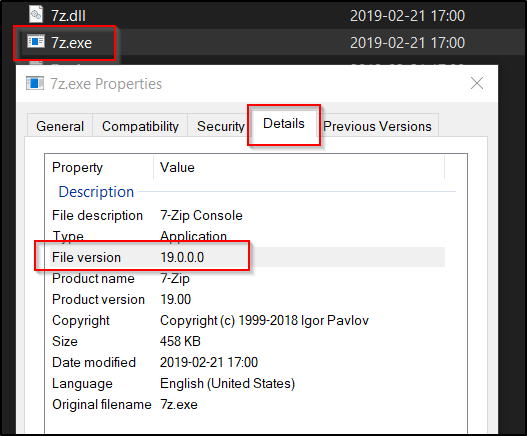
I choose to manually configure a detection rule based on the location of the .exe-file in the 7-Zip installation folder.Path: C:\Program Files\7-Zip\
File: 7z.exeOn some applications you can also find the exact application version by right clicking the .exe-file, choose Properties and Details, now look under File version.
- I choose not to configure any dependencies, these are not used by default.
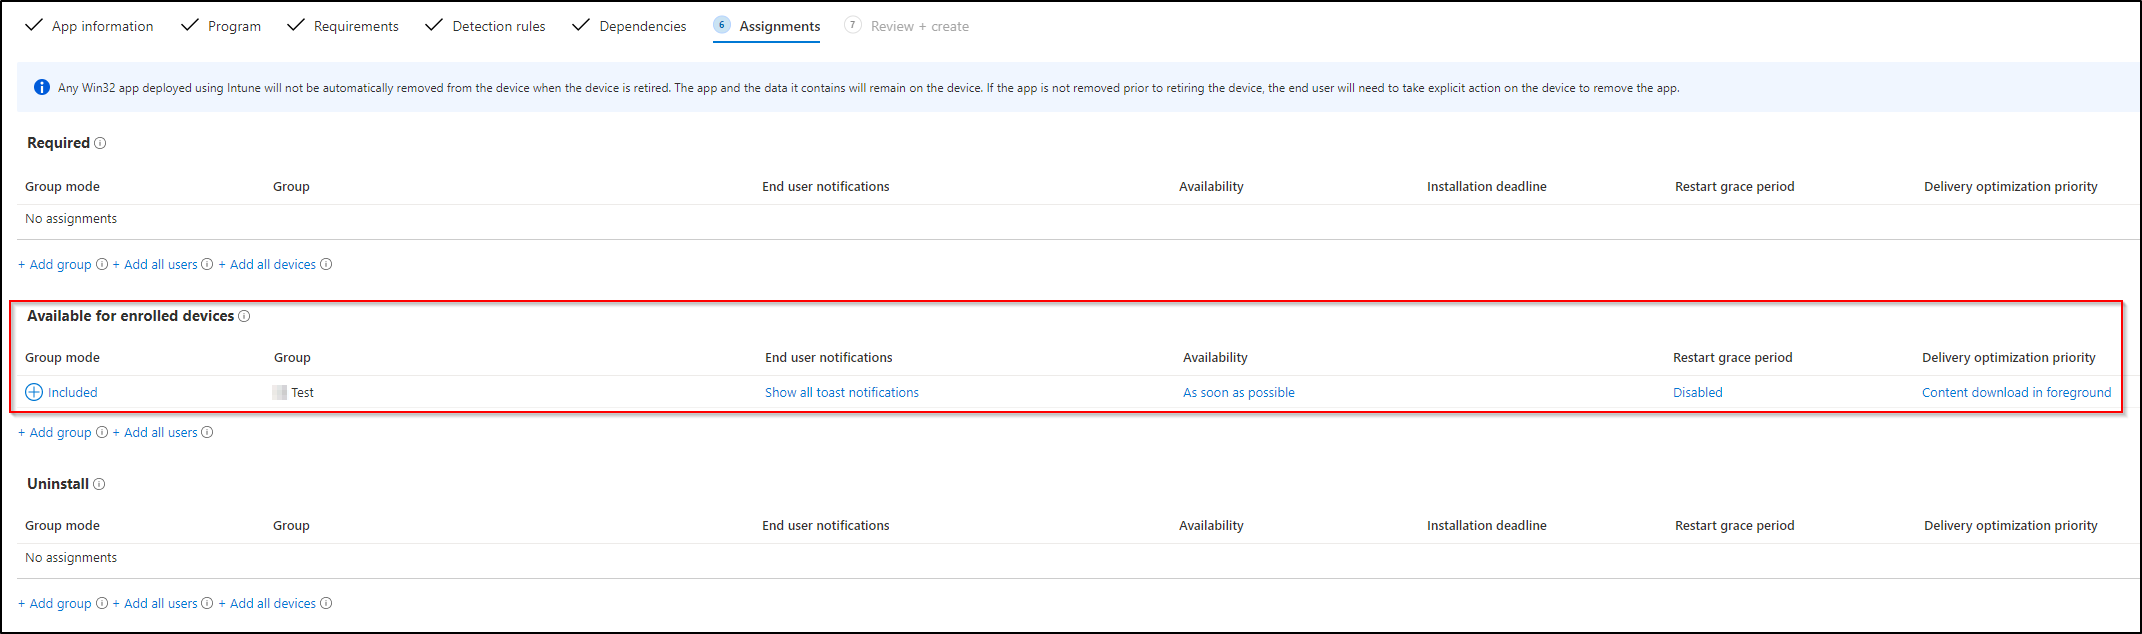
- We are now on the last step before deploying the application, Assignments. I have created a Azure Active Directory Test-group that will be used to first send it only to my computer so I can test it before deliver it to a bigger audience.
- At this moment you are ready to go thru the Review + create step and press Create.Congratulations on deploying your application!
From this point depending if you choose to force install the application or make it available you can open the start menu, go to Company Portal and find your application in there.
Thank you for reading my article and feel free to contact me if you have any further questions!
https://www.linkedin.com/in/sebastianstegrin/
Tags : Endpoint Management, Intune, Microsoft Intune, PowerShell, SCCM
Personlig rådgivning
Vi erbjuder personlig rådgivning med författaren för 1400 SEK per timme. Anmäl ditt intresse i här så återkommer vi så snart vi kan.

Add comment