Posted in : Azure, Microsoft Av Stina Perbo Översätt med Google ⟶
7 years ago
In this post we will go over how I implemented multi-platform packages for Reason with the help of esy and Azure Pipelines and publish them on npm. The high-level overview of the process is this:
- Create a npm release for each platform via `esy release`
- Copy all the different releases into a folder
- Create a package.json for the whole package and a postinstall.js file
- Copy README and LICENSE
- Create a placeholder file that we can replace in postinstall
- Package up and release to npm
If you just want to get this setup for free you can clone and use use hello-reason as a base or use the excellent esy-pesy tool to bootstrap your project.
What is esy?
esy is a package management tool that has a similar workflow to npm but built from the ground up to be fast, handle project isolation and work with native code. It is currently optimized for Reason and OCaml but can in theory be used for any language, there are multiple examples of C/C++ projects packaged as a esy-package.
I previously wrote a short post about ReasonML and esy that you can find here.
What is Azure Pipelines?
Azure Pipelines is part of Microsofts DevOps offering. It provides both CI and CD via builds and releases. Using different “agents” it’s possible to build on the three major platforms so there is no need for multiple CI platforms. It’s free for open source and has a about 30 hours free for private projects, and you can always host your own agent to have infinite free builds.
It has something they call jobs that can be used either to provide parallelism of tasks that don’t depend on each other and more interesting for this use case, multiple platforms in a single job. Jobs can also depend on each other and one job can provide input to the next.
There is a concept of artifacts that is something produced by the continuous integration pipeline that can either be consumed by another job a release or downloaded. Another useful feature is that it’s possible to split up our build definition in multiples files using templates. A template can almost be seen as a reusable function, you can break out some part of the job to a template and then pass parameters to it.
So how does the setup really work?
The rest of this blogpost will be going over the ins and outs of the setup I created for reenv, a dotenv-cli and dotenv-safe replacement written in Reason and compiled natively for Windows, macOS and Linux. It’s installable via npm but because it’s compiled to a native binary it’s about 10-20 times faster than the node equivalent.
name: $(Build.BuildId)
trigger:
  branches:
    include:
      - master
      - refs/tags/*
pr:
  branches:
    include:
      - master
jobs:
  - template: .ci/build-platform.yml
    parameters:
    platform: Linux
    vmImage: ubuntu-16.04
  - template: .ci/build-platform.yml
    parameters:
      platform: macOS
      vmImage: macOS-10.13
  - template: .ci/build-platform.yml
    parameters:
      platform: Windows
      vmImage: vs2017-win2016
This is the first part of the build definition. We start off by giving it a name and declaring when it should trigger a build, in this case any push to master, tag or PR will trigger a build. Then we use the template feature to declare the same job three times, once for each platform.
Building the package
parameters:
  platform: "macOS"
  vmImage: "macOS-10.13"
jobs:
  - job: ${{ parameters.platform }}
    pool:
      vmImage: ${{ parameters.vmImage }}
      demands: node.js
    timeoutInMinutes: 120 # This is mostly for Windows
    steps:
      # Use a recent node version
      - template: utils/use-node.yml
      # Install esy
      - template: utils/use-esy.yml
      # Install dependencies
      - script: "esy install"
        displayName: "esy install"
      # Make sure build scripts are okay
      - script: "esy pesy"
        displayName: "esy pesy"
      # Build the project
      - script: "esy build"
        displayName: "esy build"
      # Generate documentation
      - template: utils/create-docs.yml
      # Run tests and upload test data
      - template: utils/run-tests.yml
        parameters:
          platform: ${{ parameters.platform }}
      # Generate platform specific release
      - script: "esy release"
        displayName: "esy release"
      # Upload the artifacts
      - task: PublishBuildArtifacts@1
        displayName: "Publish Artifact: ${{ parameters.platform }}"
        inputs:
          PathtoPublish: "_release"
          ArtifactName: ${{ parameters.platform }}
Let’s go over the template that we use to build the different platforms.
First we declare default parameters, in this case we just use macOS as default. Then we set the name of the current job and the agent OS from the parameters.
The steps we go through to build for each platform is. Make sure the agent has a recent node version installed and install esy via npm. Install all dependencies with esy, run esy pesy to make sure the build config is correct and then build with the command specified in the package.json. We then create docs and copy then publish the generated artifacts. We will go over the testing template in more detail next. And the last step is to create the npm release for the current platform upload the artifact. The release is done via the `esy release` command that bundles the whole sandbox that esy has for the project and creates relocatable dlls and executables.
Running tests
parameters:
  platform: "macOS"
steps:
  - script: "esy test"
    displayName: "Test command"
    continueOnError: true
  - script: esy echo '##vso[task.setvariable variable=junitPath]#{self.target_dir}/default/test/junit.xml'
    displayName: "Save test results path in variable"
  - task: PublishTestResults@2
    displayName: "Publish JUnit file"
    inputs:
      testResultsFormat: JUnit
      testResultsFiles: $(junitPath)
      failTaskOnFailedTests: true
      buildPlatform: ${{ parameters.platform }}
      testRunTitle: ${{ parameters.platform }}
    condition: and(succeeded(), ne('${{ parameters.platform }}', 'Windows'))
  # On Windows the junit.xml will not be placed where we expect
  # just look for a junit.xml wherever
  - task: PublishTestResults@2
    displayName: "Publish JUnit file"
    inputs:
      testResultsFormat: JUnit
      testResultsFiles: "**/junit.xml"
      failTaskOnFailedTests: true
      buildPlatform: ${{ parameters.platform }}
      testRunTitle: ${{ parameters.platform }}
    condition: and(succeeded(), eq('${{ parameters.platform }}', 'Windows'))
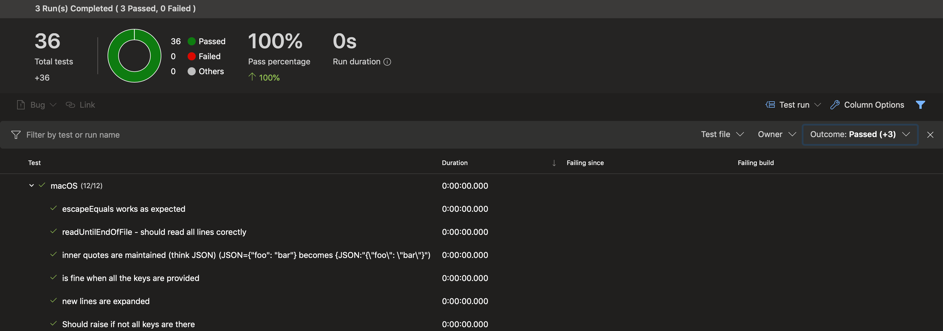
We run `esy test ` that will run the command that we have declared in the package.json and tell it to continue even if there is an error. Then we save the path to the junit.xml in a variable that we can use to publish a test report. Sadly, there is some difference in where the report is put on macOS/Linux and Windows so there is two different publishing, one when it’s not Windows and one when it is.
It will then generate a beautiful report like this, and yes, the tests are really that fast.
Creating the release
If this was a PR then we would be done as everything builds and we don’t have to create a release for it. But if this was either a push to master or a tag, we want to build a release that anyone can install. I use tags to create actual releases to npm, master will generate the package but it will not be pushed anywhere.
 - job: Release
    displayName: Release
    dependsOn:
      - Linux
      - macOS
      - Windows
    pool:
      vmImage: ubuntu-16.04
      demands: node.js
    # Only run if this is not a PullRequest
    condition: and(succeeded(), ne(variables['Build.Reason'], 'PullRequest'))
    steps:
      - template: .ci/cross-release.yml
This job is also declared in the main file that was posted as the first image. We run it on a ubuntu machine and it has a condition to not run on PullRequests. We also depend on the previous steps as we need the released artifact that we create for each platform to make a combined package.
steps:
  - template: utils/use-node.yml
  - script: "mkdir _release"
    displayName: "Create _release dir"
  - template: release-platform-setup.yml
    parameters:
      platform: "Linux"
      folder: "platform-linux"
  - template: release-platform-setup.yml
    parameters:
      platform: "macOS"
      folder: "platform-darwin"
  - template: release-platform-setup.yml
    parameters:
      platform: "Windows"
      folder: "platform-windows-x64"
  - script: "node .ci/pipelines-release.js"
    displayName: "node .ci/pipelines-release.js"
    continueOnError: true
  - script: "npm pack ."
    displayName: "npm pack"
    workingDirectory: "_release"
  - task: PublishBuildArtifacts@1
    displayName: "Publish Artifact: Release"
    inputs:
      PathtoPublish: "_release"
      ArtifactName: Release
First we make sure we have a recent node version installed. Then we create a folder to put all the releases in.
parameters:
  platform: "macOS"
  folder: "platform-darwin"
steps:
  - task: DownloadBuildArtifacts@0
    displayName: "Download ${{ parameters.platform }} Artifacts"
    inputs:
      artifactName: ${{ parameters.platform }}
      downloadPath: $(Build.StagingDirectory)
  - script: "mkdir _release/${{ parameters.folder }}"
    displayName: "Create _release/${{ parameters.folder }}"
  - script: "cp -r $(Build.StagingDirectory)/${{ parameters.platform }}/* _release/${{ parameters.folder }}"
    displayName: "cp ${{ parameters.platform }}"
Then for each platform we download the artifact that was created, create a separate folder inside the previously created release folder and copy the needed files into the newly created folder.
const fs = require("fs");
const path = require("path");
console.log("Creating package.json");
const mainPackageJson = require("../package.json");
const packageJson = JSON.stringify(
  {
    name: mainPackageJson.name,
    version: mainPackageJson.version,
    license: mainPackageJson.license,
    description: mainPackageJson.description,
    repository: mainPackageJson.repository,
    scripts: {
      postinstall: "node ./postinstall.js"
    },
    bin: mainPackageJson.esy.release.bin.reduce((acc, curr) => {
      return Object.assign({ [curr]: "bin/" + curr }, acc);
    }, {}),
    files: [
      "_export/",
      "bin/",
      "postinstall.js",
      "esyInstallRelease.js",
      "platform-linux/",
      "platform-darwin/",
      "platform-windows-x64/"
    ]
  },
  null,
  2
);
fs.writeFileSync(
  path.join(__dirname, "..", "_release", "package.json"),
  packageJson,
  {
    encoding: "utf8"
  }
);
try {
  console.log("Copying LICENSE");
  fs.copyFileSync(
    path.join(__dirname, "..", "LICENSE"),
    path.join(__dirname, "..", "_release", "LICENSE")
  );
} catch (e) {
  console.warn("No LICENSE found");
}
console.log("Copying README.md");
fs.copyFileSync(
  path.join(__dirname, "..", "README.md"),
  path.join(__dirname, "..", "_release", "README.md")
);
console.log("Copying postinstall.js");
fs.copyFileSync(
  path.join(__dirname, "release-postinstall.js"),
  path.join(__dirname, "..", "_release", "postinstall.js")
);
console.log("Creating placeholder files");
const placeholderFile = `:; echo "You need to have postinstall enabled"; exit $?
@ECHO OFF
ECHO You need to have postinstall enabled`;
fs.mkdirSync(path.join(__dirname, "..", "_release", "bin"));
const binPath = path.join(
  __dirname,
  "..",
  "_release",
  "bin",
  mainPackageJson.esy.release.bin[0]
);
fs.writeFileSync(binPath, placeholderFile);
fs.chmodSync(binPath, 0777);
We then run a node script that creates a package.json without dependencies by reading your project package.json. It also copies your LICENSE and README.md if they exist and copies a postrelease.js file. This script figures out what platform the package is installed on, copies the correct files in place and runs the esy generated postinstall script for the correct platform. The script that esy generate will replace placeholder paths so that they are actual paths on the consumers machine. The last step is to create a placeholder file and make it executable.
:; echo "You need to have postinstall enabled"; exit $?
@ECHO OFF
ECHO You need to have postinstall enabled
This script is interesting on it’s own as it’s both bash and batch at the same time, to learn more about it you can read this. The placeholder just echoes “You need to have postinstall enabled”. As it’s both bash and batch at the same time it’s runnable on all three platforms without modification. At first I had a js file but npm was “smart” and decided that my package should be run with node which broke the binary.
Testing the release before releasing it to npm
  - job: TestReleaseLinux
    displayName: Test Release Linux
    dependsOn:
      - Release
    pool:
      vmImage: ubuntu-16.04
      demands: node.js
    condition: and(succeeded(), startsWith(variables['Build.SourceBranch'], 'refs/tags'))
    steps:
      - template: .ci/test-release.yml
  - job: TestReleasOsX
    displayName: Test Release osX
    dependsOn:
      - Release
    pool:
      vmImage: macOS-10.13
      demands: node.js
    condition: and(succeeded(), startsWith(variables['Build.SourceBranch'], 'refs/tags'))
    steps:
      - template: .ci/test-release.yml
  - job: TestReleaseWindows
    displayName: Test Release Windows
    dependsOn:
      - Release
    pool:
      vmImage: vs2017-win2016
      demands: node.js
    condition: and(succeeded(), startsWith(variables['Build.SourceBranch'], 'refs/tags'))
    steps:
      - template: .ci/test-release.yml
If the build was triggered because of a tag we want to test that our release will work on all the platforms before releasing it on npm. This is done for all the platforms.
steps:
  - template: utils/use-node.yml
  - task: DownloadBuildArtifacts@0
    displayName: "Download Release Artifacts"
    inputs:
      artifactName: Release
      downloadPath: $(Build.StagingDirectory)
  - script: npm -g install reenv-$(Build.SourceBranchName).tgz
    displayName: Install the package
    workingDirectory: $(Build.StagingDirectory)/Release
  - script: reenv -e test/fixtures/.env node test/index.js
    displayName: Test if command installed successfully
First we make sure we have a recent version of node and then we download the the packaged release artifact. We then install the package from the tarball and run the binary, the pipeline will fail if the command exits with a non-zero exit code.
Releasing to npm
At the moment of writing this Azure Pipelines doesn’t support the release workflow in yaml which includes release gates and other powerfull features. I have a setup that I did through the UI that takes the package and basically runs `npm publish` on it. I will write a follow up on this post when the yaml feature is released. But getting it setup with the UI is pretty straight forward.
Tags : Azure DevOps, binary, cli, Development, dotenv, esy, fast, npm, OCaml, Reason, ReasonML
Personlig rådgivning
Vi erbjuder personlig rådgivning med författaren för 1400 SEK per timme. Anmäl ditt intresse i här så återkommer vi så snart vi kan.

Add comment