Posted in : Microsoft, Office 365, Teams Av Oliwer Sundgren Översätt med Google ⟶
3 years ago
If you want to level up the way you’re scheduling Teams meetings, look no further!
Creating a Teams meeting with required registration has a lot of positive and cool features. For example
- You can publish a link to a registration form, where participants will get information about spekers, fill in information about themselves in a form
- The organizer will get a report of all registered attendees based from the forms
- The Organizer does not have to worry about sending out a meeting link to multiple people and scavenging for email addresses to send out said meeting link to
So how do we get started?
Create a new meeting :
The first step is to jump into the Teams client and create a meeting in the calendar app like you usually do, fill in the information about the meeting. But instead of sending the meeting, look for this setting and choose “everyone”
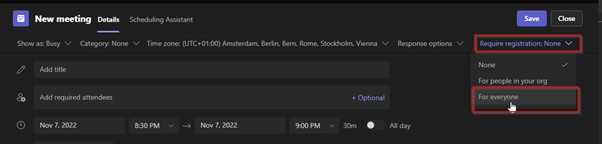
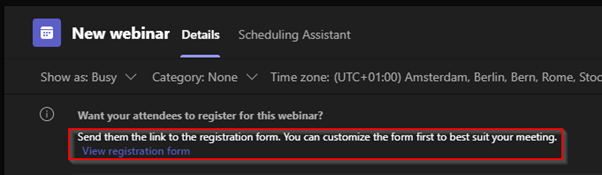
This will then give you a new option just above the title box. This option is to edit the registration form. We will go ahead and click on that to continue the setup.
But first, you can in the regular meeting creation add a title, start date and attendees. The Attendees you add here will be your speakers, or internal people that will be co-organizers with you and don’t have to follow the registration flow like other attendees. You can go ahead and click “Send” on the meeting.
Customizing the registration form:
Now to the fun part! Actually setting up the registration form.
After you clicked the button in the meeting that popped up after you enabled Registration, this will open a webpage for editing the registration form.
The form out of the box looks like this
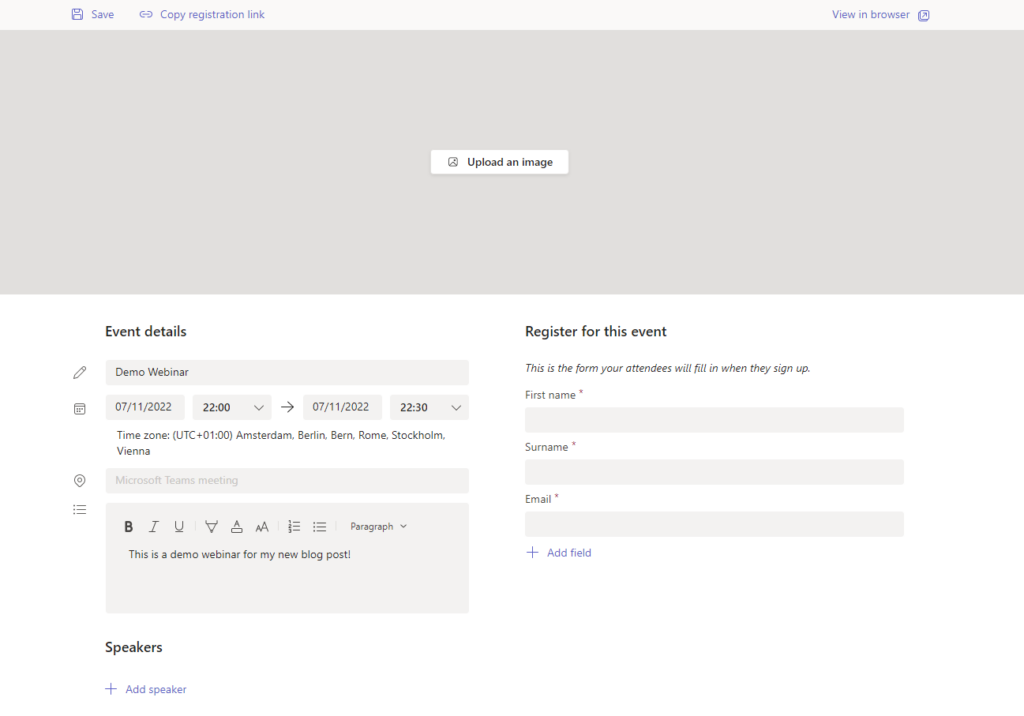
So as we can see, we can add a Title to the meeting, start/end time, image and a description.
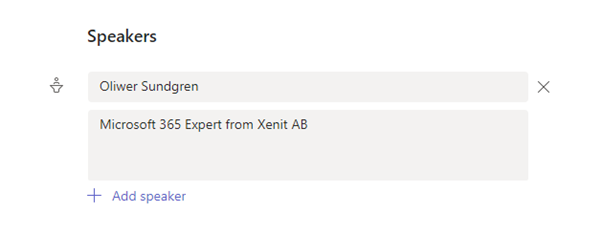
other than that we can also add Speakers, we would fill out a DisplayName and a Bio about the speaker like the example below
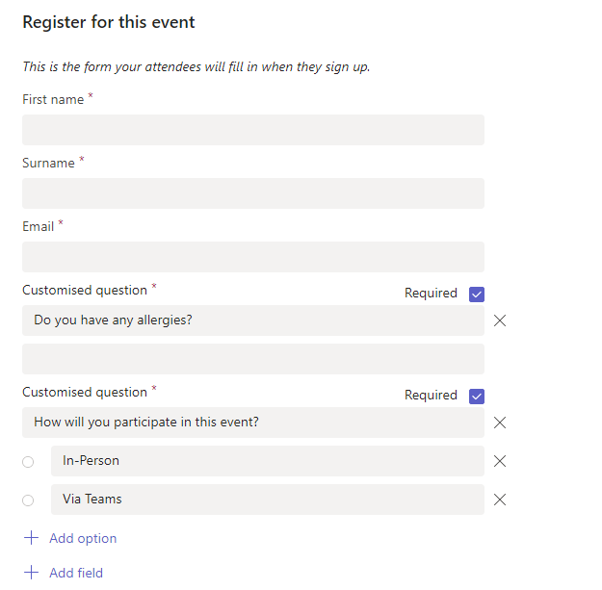
Once we’ve added our speakers it’s time to look over the registration form itself, what Information do we want attendees to provide? Maybe we are hosting a live webinar where snacks and drinks will be provided, then it could be good to be informed about allergies for example. And if they will participate online via Teams or physically on the event. We could then choose to add fields to the form. There are a few built in fields that are most common, but we could choose custom option and from there we could choose input or choice, we will do one of each to add the question about allergies and if people will participate in person or online.
So the form would now look like this, note that we can also set the new fields as Required if we want to
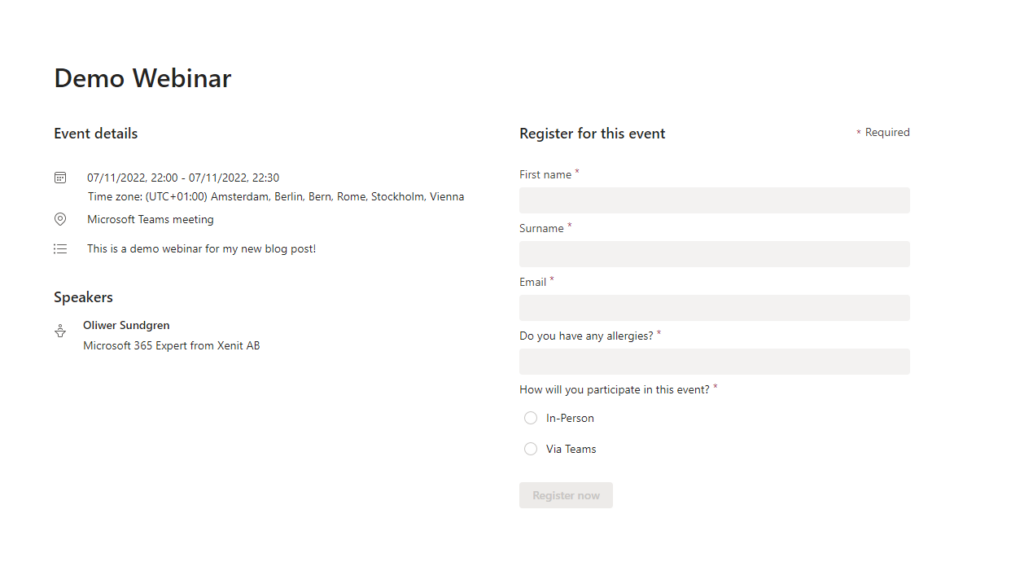
Once we are satisfied with our form we can Hit save, this will then show us a preview of the form. Mine would look like this.
You can now click the “Copy registration link” and publish it in SharePoint, your website or in any way you want in order to start getting attendees to register.
Attendee experience:
Now we will look at the experience from a attendees point of view when they will register for the webinar/meeting
1: The Attendee will click the Registration link that will redirect them to the form we edited before
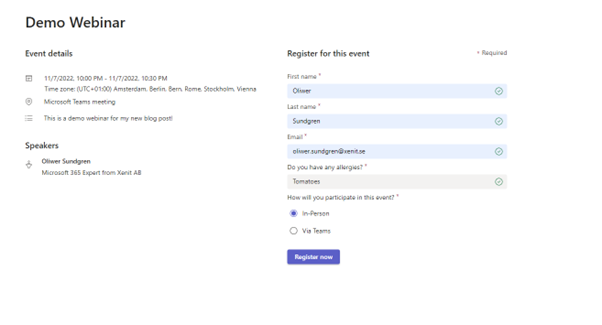
2: The attendee fills out their information and clicks “Register Now”

3: After a while the attendee will get an email to the email address provided in the form. This includes the meeting link
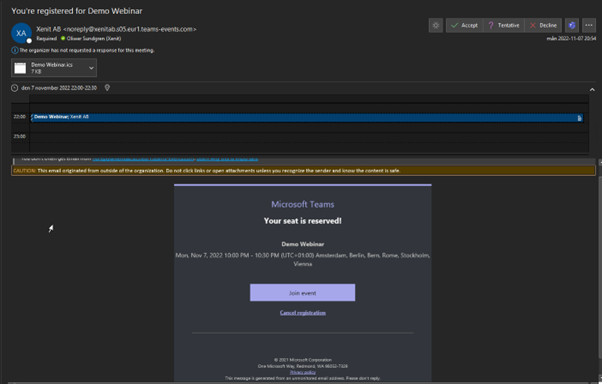
4: You’re all set, now just join the meeting/Webinar on the start time like normal!
Organizer experience:
The Organizer will be able to go into the meeting in their Teams client and see more information about who has registered and all the needed information from the form, like allergies and how many people will participate in-person.
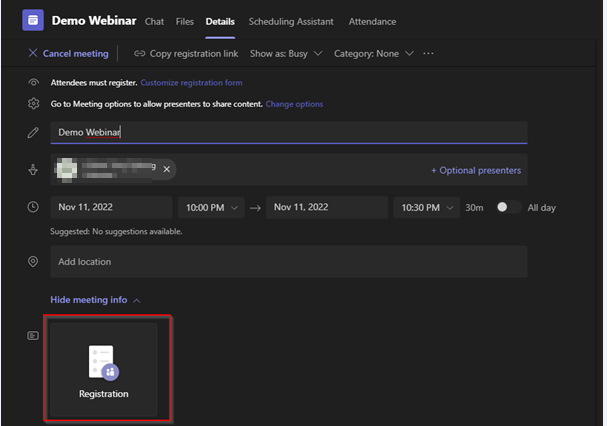
1: Open the meeting in the Teams Calendar app
2: Then click the “Registration” button
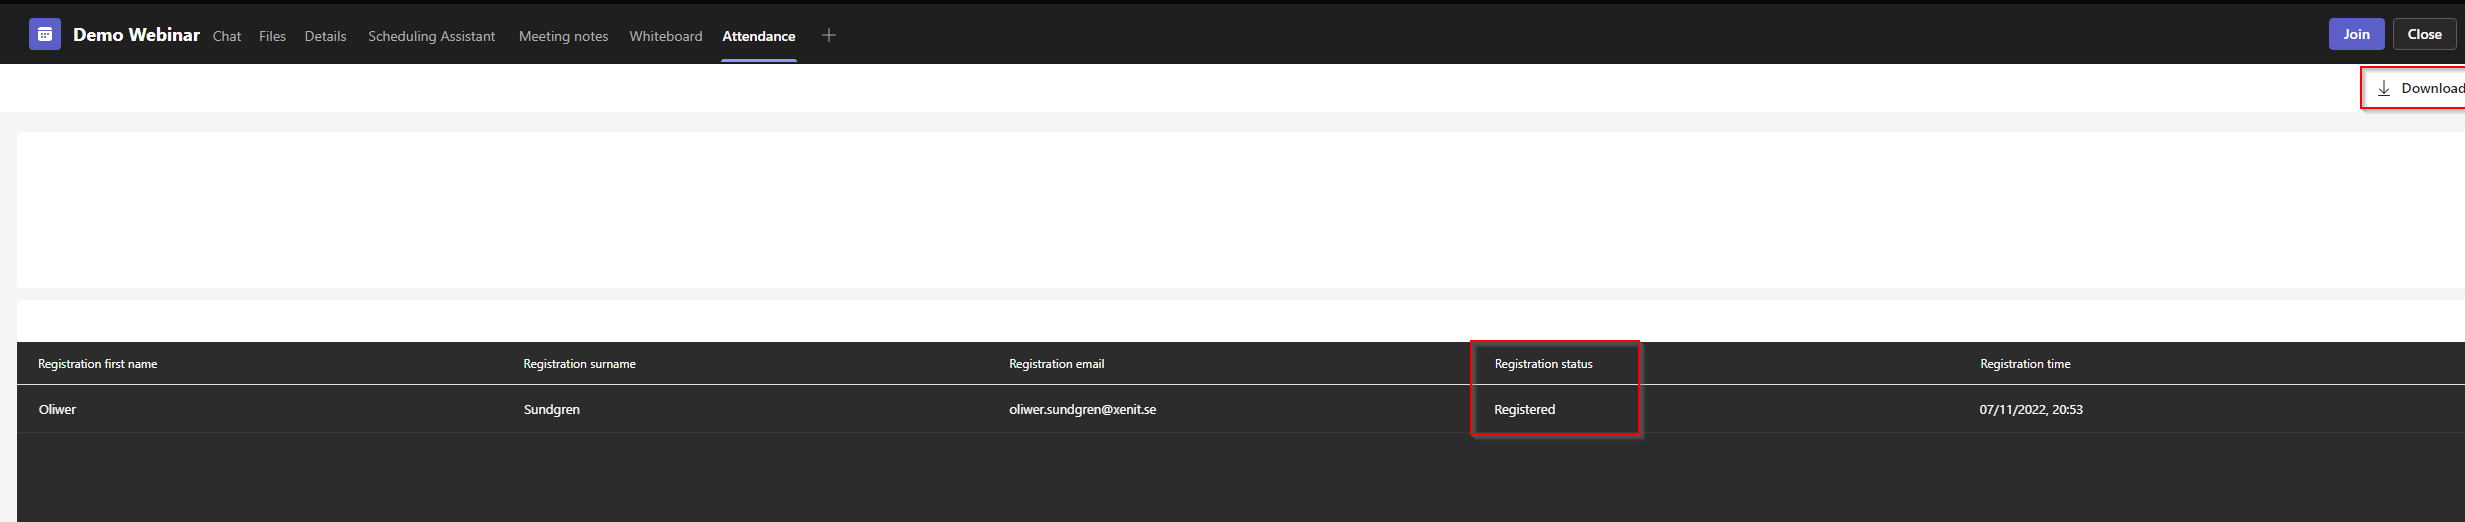
This will give us a overview of who has registered, and if any previously registered people have chosen to cancel. We can also click the “Download” button to get a better report, this will show us the custom fields we added to the form.
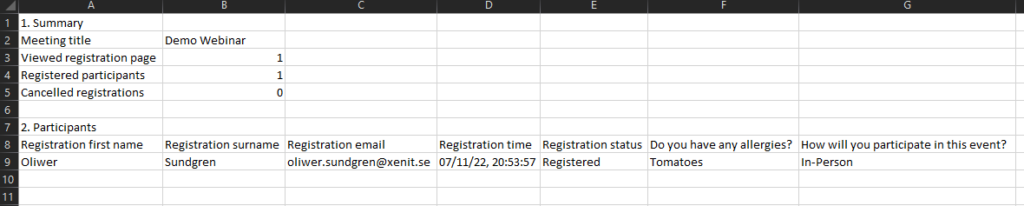
The Downloaded report is an Excel file and looks like this. As you can see we have the custom fields here. This makes it easy to plan for purchasing of snacks and drinks for the event.
Summary:
Now we have set up a meeting/webinar and required people to register to it.
We also customized the registration form to give us information about the attendees allergies and if they would participate for the meeting in the office or via Teams.
This feature is a hidden gem, I’ve not stumbled upon many people that actually use this feature, but I think its great and it would simplify meeting administration.
If you have any questions or want to know more about this feel free to get in touch with me in the comments or by sending me an email on Oliwer.sundgren@xenit.se
Thanks for reading!
Tags : How to, Microsoft, Microsoft 365, Microsoft Teams, Office 365, Teams
Personlig rådgivning
Vi erbjuder personlig rådgivning med författaren för 1400 SEK per timme. Anmäl ditt intresse i här så återkommer vi så snart vi kan.

Add comment